When outfitting a recreational vehicle or trailer, selecting the right entry system is critical. From structural integrity to weather resistance, Custom RV & Trailer Doors elevate both form and function for mobile lifestyles. Proper installation not only safeguards against moisture intrusion but also enhances security and thermal efficiency throughout every season. This guide explores essential procedures, tool recommendations, and alignment strategies designed to ensure a flawless fit. Readers will discover how to achieve professional-grade results with practical insights drawn from industry best practices.
What are the RV door installation steps?
Understanding the full sequence of rv door installation steps provides clarity before starting the project. The process begins with removing the existing door assembly, followed by preparing the opening for a precise fit. Next, installers position and secure the new door, paying close attention to seal placement around the perimeter. Finally, adjustments are made to guarantee smooth operation and proper closure. Each phase builds upon the last, reducing the risk of leaks, misalignment, or premature wear.
Why choose Custom RV & Trailer Doors?
Custom RV & Trailer Doors offer tailored solutions that adapt to unique floor plans, wall thicknesses, and aesthetic preferences. Manufactured with premium materials—such as anodized aluminum, reinforced fiberglass, or heavy-duty steel—these doors are engineered for longevity in harsh road environments. The precision fit minimizes gaps that could allow dust, rain, or insects to infiltrate the living space. When ordered through specialized providers, owners also gain access to custom glazing options, integrated screen frames, and color-matched trim kits for seamless integration.
What tools are required for a perfect door installation?
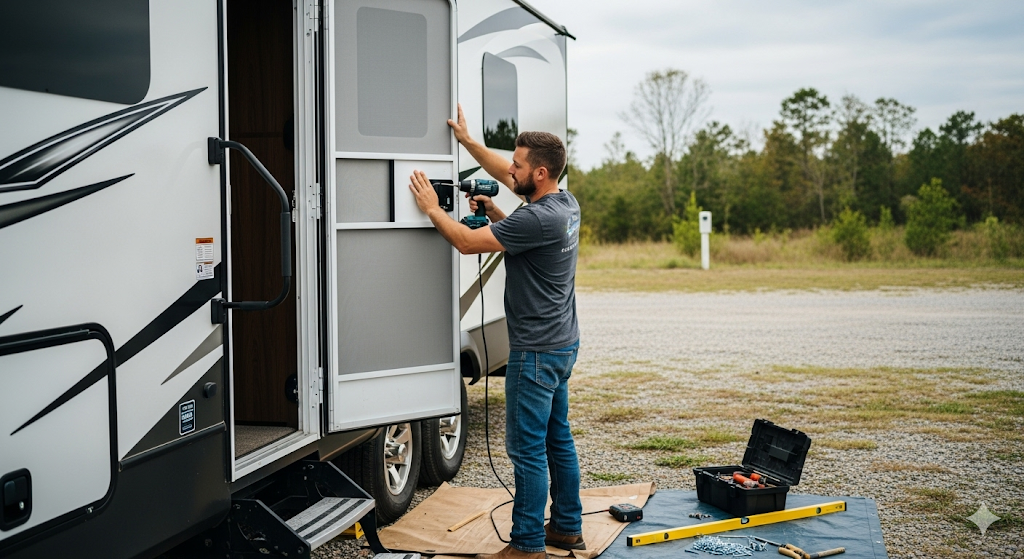
A successful door setup depends on having the right equipment on hand. Installers typically need a power drill with assorted driver bits, a quality caulking gun, and a set of specialized screws rated for exterior use. Hand tools include chisels for hinge mortises, a pneumatic rivet gun for compartment fasteners, and measuring instruments like a laser level or digital calipers. Safety gear—glasses, gloves, and a dust mask—ensures protective standards throughout cutting and sealing operations. Investing in precise instrumentation pays dividends when fine-tuning mounting holes and verifying flush alignment.
How to ensure a proper trailer door weather seal?
A robust trailer door weather seal prevents water intrusion, air leaks, and thermal bridging in mobile dwellings. Most installations employ putty tape or PVC foam tape placed continuously around the frame’s perimeter, creating a uniform compression seal when the door is closed. After securing the door mechanically, a high-quality marine-grade sealant is applied to exterior seams, eliminating potential voids. Proper curing time is essential; installers should follow manufacturer guidelines to allow full cross-linking of the sealant compounds. Attention to corners and transitions around hinges or slide-in drip caps guarantees moisture resistance under heavy rain or high-speed travel.
Type of Weather Seal Materials
| Material | Type | Max Thickness | Application |
| Putty Tape | Butyl | 1/8″ | Foam compression |
| PVC Foam Tape | PVC Foam | 1/4″ | Adhesive-backed |
| Marine Sealant | Silicone | N/A | Exterior seams |
What are the best door alignment tips?
Achieving precise door alignment ensures smooth operation and extends hardware life. Installers should verify vertical plumb and horizontal level of the frame before tightening any screws. Camber adjustment methods—using a 2×4 to add or relieve pressure at diagonal corners—fine-tune the closing gap. Aim for a uniform clearance of 1/8″ to 1/4″ along the latch side to balance ease of opening with seal compression. Checking hinge pin engagement and testing the door at varying temperatures can reveal thermal expansion effects that may require minor tweaks.
Alignment Tolerance Chart
| Measurement Location | Ideal Gap | Adjustment Method |
| Latch Side | 1/8″–1/4″ | Camber with 2×4 pressure |
| Top Corner | 1/8″ | Shim under hinge plates |
| Bottom Corner | 1/4″ | Add or remove tape |
Step-by-Step Guide to Installing an RV or Trailer Door
Step 1: Remove the Old Door
First, uninstall the drip cap and any decorative trim that conceals fasteners. Opening the door fully, remove each hinge screw or rivet systematically, ensuring the door disengages evenly. Safely set the old door aside and inspect the rough opening for damage or debris. Cleaning the frame and removing loose sealant creates a smooth substrate for the new sealant and foam tapes to adhere properly.
Step 2: Prepare the Opening
Next, measure the rough opening dimensions at multiple points—top, middle, and bottom—to account for any irregularities. Apply a continuous bead of marine-grade sealant around the perimeter of the frame’s interior face. Press putty tape or foam tape into the sealant bed, ensuring full contact without stretching. This double-seal approach prevents future leaks and deadens vibration from road shock.
Step 3: Position and Secure the Door
With a helper supporting the unit, slide the new door into the prepared opening. Center it carefully, then insert screws or rivets loosely at diagonal corners. Check that the door swings freely without binding. Once preliminary fasteners are in place, torque them in sequence, moving from corners inward in an “X” pattern to maintain square alignment.
Step 4: Seal and Insulate
After mechanical fastening, fill any visible gaps with sealant, smoothing with a wet finger or tooling tool for a flush finish. From the interior, apply low-expansion spray foam in voids between the frame and wall. Trim excess foam once fully cured. This internal insulation step improves thermal performance and reduces noise transmission.
Step 5: Final Adjustments
Close the door and inspect for consistent compression along the weather seal. If certain areas are too tight or loose, adjust hinge plate shims or retorque screws incrementally. Test latch engagement, door travel, and lock smoothness multiple times. Confirm that the door remains aligned when opened to 90 degrees and closed firmly with one hand.
Material and Seal Choices for Long-Lasting Performance
Selecting materials designed for mobile applications ensures durability despite constant vibration and exposure. Anodized aluminum frames resist corrosion, while reinforced fiberglass skins withstand impact and UV degradation. High-grade EPDM rubber seals and butyl putty tapes maintain elasticity across temperature extremes. When ordering door assemblies, it’s wise to specify marine-grade stainless steel hardware and optional screen door components to enhance ventilation without sacrificing insect protection.
For tailored solutions, explore our Custom RV & Trailer Doors crafted to match every model’s dimensional and aesthetic requirements. Each unit ships with factory-applied sealant and predrilled hardware holes to streamline on-site installation.
Expanding Your Options with Related Products
Beyond the entry door, a complete upgrade might include cabinetry hatches or compartment lids. Browse the full catalog of Custom RV & Trailer Products to complement door installations with handle sets, magnetic catches, and decorative fascia panels. Integrating matching trims across multiple access points creates a cohesive, professional-grade appearance throughout the vehicle.
Enhancing Light and Airflow
Interior comfort often hinges on the quality of windows and screens adjacent to door openings. Installers can pair solid doors with Custom Trailer Screens & Glass that feature tinted, tempered glass and removable insect screens. These options allow for finely tuned control over daylight and privacy while maintaining a tight seal when the door is closed.
Authentic Replacement Components
For ongoing maintenance, genuine Custom RV & Trailer Parts such as hinge kits, lock cylinders, and gaskets guarantee compatibility and peak performance. Aftermarket substitutes may fit initially but often lack the precise tolerances and durability of manufacturer-grade parts, leading to early failure and costly service calls.
Professional Support and Consultation
While many enthusiasts tackle door replacements as DIY projects, a flawless outcome sometimes depends on specialized expertise. If a professional install is desired, don’t hesitate to Contact Us to arrange consultation, on-site support, or complete turnkey installation packages.
Conclusion
A well-executed door installation transforms an RV or trailer into a secure, weather-tight haven on wheels. By following structured rv door installation steps, selecting premium seal materials, and applying proven door alignment tips, mobile homeowners can achieve long-term reliability. Embracing Custom RV & Trailer Doors ensures optimal fit, superior aesthetics, and peace of mind. For expert craftsmanship and personalized service, trust SDG Trailers to deliver precision-engineered solutions that stand the test of the open road.
Frequently Asked Questions
How do I choose the right size door for my RV or trailer?
Selecting the correct size involves measuring the rough opening’s height, width, and depth at multiple points. Always refer to the door manufacturer’s tolerance range to ensure a snug fit without excessive force. Ordering a custom-sized door accommodates variations in wall panel thickness and frame construction.
How often should I replace the door weather seal on my RV?
Under normal use, high-quality EPDM or PVC foam seals last between five to seven years. Exposure to extreme UV, fluctuating temperatures, and frequent opening accelerates wear. Inspect seals annually and replace them at the first sign of cracking, compression set, or leakage.
Can I use universal doors or do I need custom-fit doors?
Universal doors can work temporarily, but they rarely match irregular opening dimensions or wall thicknesses precisely. Custom-fit doors eliminate the need for gap fillers or exotic trim shimming, reducing installation time and ensuring a factory-grade seal without compromises.
What maintenance is required after door installation?
Routine care includes lubricating hinge pivots and lock mechanisms twice a year with a silicone-based spray. Clean sealing surfaces with mild detergent and reapply sealant beads around the exterior seams as needed. Tighten fasteners after the first 100 miles of travel to compensate for initial settling.
How do I troubleshoot door alignment after installation?
If gaps exceed the recommended 1/8″–1/4″ range, adjust camber by gently applying pressure at the appropriate diagonal using a 2×4. Loosen hinge screws incrementally to reposition the frame, then retorque fasteners in an “X” pattern. Fine-tune latch strike position by shim insertion or minor filing for perfect closure.